DDG search drop in powered by ddg.patdryburgh.com
tl;dr - Automate your deployments without adding a new reconciliation loop (i.e. Flux or ArgoCD), make a limited-permission ServiceAccount, drop your credentials in a GitLab protected variable and set up some CI steps to build your containers (with CI-powered Docker in Docker) and update your deployments.
DevOps has been growing increasingly important and complicated these days. There’s a wave of new approaches, enthusiasm, companies, and organizations trying to make things to achieve consistency and advanced features in the operations world. It feels a bit like the Javascript crowd (famous for innovation and churn) has discovered the world of the sysadmins. Obligatory link to the CNCF landscape.
It doesn’t always have to be cutting edge all the time though – I’d like to lay out in this post how I deploy this blog, a basically low-tech (and pretty reliable) way of deploying some application that isn’t technically challenging to operate.
Since my current cluster orchestrator of choice is Kubernetes (as opposed to “none”, or Nomad, Ansible, etc), there will be some incidental complexity here but the important pieces are simple:
At this point keen readers will note that we’re absolutely still on some defintion of cutting edge and I’ve lied through my teeth. It’s not a complete lie because out there on the cutting edge there’s another cutting edge, which is adding a reconciliation loop (the whole point of Kubernetes, essentially) to your code itself, with tools like Flux and ArgoCD. So the cutting edge I’m avoiding is that second one – those who are looking for a guide to setting up automated deployment from CI with SSH or Ansible (which are absolutely valid ways to do deployments!), this isn’t the post for you.
It feels like too many people skip the step of doing simple CI things in their automation journey so I thought it was worth sharing. You can get very far with just a little bit of CI magic. There is unfortunately quite a bit of setup required in the background (having a Kubernetes cluster, making a ServiceAccount on the k8s side, clicking around GitLab’s API) but it’s a once-and-done so I feel it’s worth the tradeoff. Of course, if you’re still SSHing in and deploying the general scheme of this approach will still work for you – just replace all the Kubernetes stuff with concepts relevant to your deployment strategy (ServiceAccount credentials -> SSH creds, kubectl apply -> systemctl start, etc).
Anyway, enough preamble, let’s get started.
Easier and easier these days to get a k8s cluster up and running, a few options:
k0s (my personal favorite, my cluster runs on it)k3skubeadmkind (Kubernetes IN Docker, usually for local dev)minikube (usually for local dev)ServiceAccount with sufficiently limited permissionsAs you probably don’t want to award an all-powerful ServiceAccount to your CI, here’s the YAML to make one that has some reasonable permissions:
ci.serviceaccount.yaml
---
apiVersion: v1
kind: ServiceAccount
metadata:
  name: ci
  namespace: your-namespace
ci.rbac.yaml
---
apiVersion: rbac.authorization.k8s.io/v1
kind: Role
metadata:
  name: ci
  namespace: your-namespace
rules:
  - apiGroups:
      - ""
      - apps
      - extensions
      - autoscaling
    resources:
      - deployments
      - services
    verbs:
      - get
      - list
      - create
      - update
      - patch

  # cert-manager resources
  # (you don't need this if you don't run Cert-Manager)
  - apiGroups:
      - cert-manager.io
    resources:
      - certificates
    verbs:
      - get
      - list
      - create
      - update

  # traefik resources
  # (you don't need this if you don't run Traefik)
  - apiGroups:
      - traefik.containo.us
    resources:
      - middlewares
      - ingressroutes
      - ingressroutetcps
      - ingressrouteudps
    verbs:
      - get
      - list
      - create
      - update

---
apiVersion: rbac.authorization.k8s.io/v1
kind: RoleBinding
metadata:
  name: ci
  namespace: your-namespace
roleRef:
  kind: Role
  name: ci
  apiGroup: rbac.authorization.k8s.io
subjects:
- kind: ServiceAccount
  name: ci
The above YAML says more about my setup than it would about a general one, but it should be easy to extrapolate what you’d need to match a more traditional setup. For example, I use Traefik so I don’t actually deal in Ingress but rather IngressRoute objects. I also use the Certificate CRD offered by Cert-Manager because it allows me to decouple TLS certificate generation from serving traffic (Cert-Manager is one of the most useful tools in the ecosystem, if you’ve just learned about it through this blog post, you are welcome).
ServiceAccount credentials to use with kubectlWe’re going to abuse the system a bit here, and use the ServiceAccount to access the cluster from outside the cluster (rather than a pod inside the cluster), by exporting the data into a set of credentials. Since doing it was really annoying I’ve automated it:
ci-kubeconfig: generate
  export SECRET_NAME=$(shell $(KUBECTL) get secrets -n your-namespace | grep blog-ci | cut -d' ' -f1) && \
  export CA=`$(KUBECTL) get secret $$SECRET_NAME -o jsonpath='{.data.ca\.crt}'` && \
  export TOKEN=`$(KUBECTL) get secret/$$SECRET_NAME -o jsonpath='{.data.token}' | base64 --decode` && \
  export NS=`$(KUBECTL) get secret/$$SECRET_NAME -o jsonpath='{.data.namespace}' | base64 --decode` && \
  write-serviceaccount.
  mv /tmp/generated.kubeconfig.yaml ../secrets/ci.kubeconfig.yaml
And here’s what’s in write-serviceaccount.bash:
#!/bin/bash

echo -e "---
apiVersion: v1
kind: Config
clusters:
- name: default-cluster
  cluster:
    certificate-authority-data: ${CA}
    server: https://<your cluster url goes here>:6443
contexts:
- name: default-context
  context:
    cluster: default-cluster
    namespace: default
    user: default-user
current-context: default-context
users:
- name: default-user
  user:
    token: ${TOKEN}
" > /tmp/generated.kubeconfig.yaml
It actually took a surprising amount of time to get the automation for spitting out service account creds just right – there’s almost certainly a Krew plugin that would do it, but Kubernetes has always been a bit weird about managing users (pushing people towards OIDC auth, but providing ServiceAccounts and creds-via-X.509-certs which are kind of similar).
Before you go recklessly storing secrets in your repository, make sure to jump to the end and read the section on storing secrets at the end of this post!!
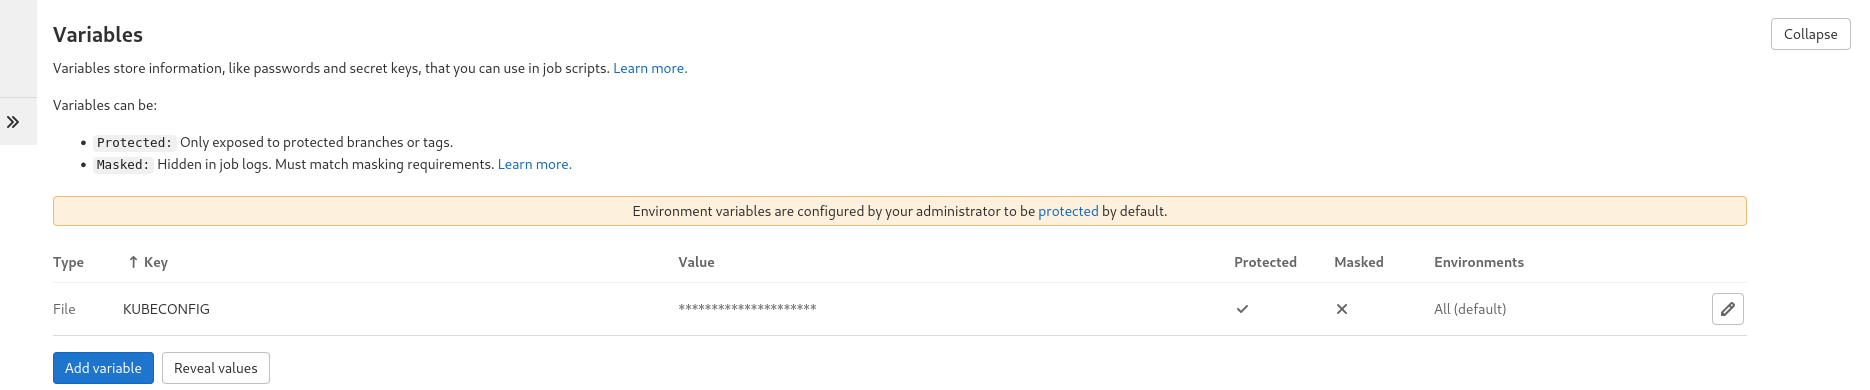
ServiceAccount credentials as GitLab as a protected variableTo be able to run kubectl from CI we’re going to need access to the credentials we’ve just generated (@ secrets/ci.kubeconfig.yaml) for the ServiceAccount we created in the previous step. This is relatively easy to do but does require some clicking around in GitLab’s UI, if you don’t want to start mucking about with automation for that too (GitLab has an API so it is possible…).
The UI is pretty easy on the eyes – as of this post it looked like this:
Here’s the GitLab CI YAML that powers this very blog:
image: alpine:latest

stages:
  - build
  - deploy

cache:
  paths:
    - kubectl
    - kustomize

build:
  stage: build
  image: alpine:latest
  artifacts:
    name: "build-$CI_COMMIT_REF_NAME-$CI_JOB_STARTED_AT"
    expire_in: 1 week
    paths:
      - vadosware/dist
  script:
    - apk add hugo make
    - make build

deploy_blog_k8s:
  stage: deploy
  image: docker
  services:
    - docker:dind
  only:
    - main
  variables:
    KUBE_VERSION: v1.20.0
    KUSTOMIZE_VERSION: v4.1.2
    KUBECTL: kubectl --v=2
  needs:
    - job: build
      artifacts: true
  script:
    # Install kubectl (use cached version otherwise)
    - apk add curl make hugo gettext git openssh
    - |
      if [ ! -f kubectl ] ; then \
        curl -LO "https://storage.googleapis.com/kubernetes-release/release/$KUBE_VERSION/bin/linux/amd64/kubectl"; \
        chmod +x kubectl;
      fi;
    - cp kubectl /usr/bin/kubectl
    # Install kustomize
    - |
      if [ ! -f kustomize ] ; then \
        curl -LO "https://github.com/kubernetes-sigs/kustomize/releases/download/kustomize/${KUSTOMIZE_VERSION}/kustomize_${KUSTOMIZE_VERSION}_linux_amd64.tar.gz"
        tar -xvf kustomize_${KUSTOMIZE_VERSION}_linux_amd64.tar.gz
      fi;
    - cp kustomize /usr/bin/kustomize
    # Docker login
    - docker login -u gitlab-ci-token --password $CI_BUILD_TOKEN registry.gitlab.com
    - make image publish deploy-k8s-ci
Not particularly optimal (I could have baked the various binaries into a pre-built image), but it works and I don’t think about it. There’s also some caching so I’m not being a completely bad net citizen by downloading kubectl and kustomize every once in a while. The reason I download kustomize specifically is because it was in the case in the past (and is likely to be in the future) that the slight lag between kustomize and kubectl releases can contribute to some features not being present when using the kustomize bundled with kubectl.
To test the branches and modify the gitlab-ci.yml file, I generally test changes like this in a branch, and what I do is to add the branch as a “protected” branch for a while during testing.
You probably noticed that I use make pretty extensively and there were some targets that describe what they’re doing you but don’t tell you the how. You’re going to have to bring your own Makefile for targets like image, publish, and deploy-k8s-ci but they should be pretty easy. Here’s deploy-k8s-ci for the lazy:
deploy-k8s-ci:
    $(MAKE) -C infra/kubernetes deployment svc ingress hpa
And if you follow that [recursive make][recursive-make] call:
# ... lots more makefile magic ...

GENERATED_DIR ?= generated

generate: generated-folder
    $(KUSTOMIZE) build -o $(GENERATED_DIR)/

# If the deployment is present then patch it with a deployDate label (&& case)
# If the deployment is not present then apply it for the first time (|| case)
deployment: generate
ifeq (, $(shell $(KUBECTL) get deployment $(K8S_DEPLOYMENT_NAME) -n $(K8S_NAMESPACE)))
    @echo -e "[info] no existing deployment detected"
    $(KUBECTL) apply -f $(GENERATED_DIR)/apps_v1_deployment_blog.yaml
else
    @echo -e "[info] existing deployment ${K8S_DEPLOYMENT_NAME} in namespace ${K8S_NAMESPACE} deployment"
    $(KUBECTL) patch deployment $(K8S_DEPLOYMENT_NAME) -n $(K8S_NAMESPACE) -p "{\"spec\":{\"template\":{\"metadata\":{\"labels\":{\"deployDate\":\"`date +'%s'`\"}}}}}"
endif
    @echo -e "[info] done"

deployment-force: generate
    $(KUBECTL) apply -f $(GENERATED_DIR)/apps_v1_deployment_blog.yaml

svc:
    $(KUBECTL) apply -f svc.yaml

ingress: generate ingress-middleware certificate
    $(KUBECTL) apply -f $(GENERATED_DIR)/traefik.containo.us_v1alpha1_ingressroute_blog-http.yaml
    $(KUBECTL) apply -f $(GENERATED_DIR)/traefik.containo.us_v1alpha1_ingressroute_blog-https.yaml

hpa:
    $(KUBECTL) apply -f hpa.yaml

# ... lots more makefile magic ...
The use of kustomize here is a bit old (it’s not as overlay heavy as my more recent code), but the code does work (for me, YMMV).
Don’t listen to people who tell you to never store your credentials in a repo. If you believe in proper encryption then you believe in storing credentials in our repo, granted that they’re properly encrypted. Check out git-crypt – it’s one of the simplest implementations of this that I’ve seen and the way it integrates (as a git filter) is really easy to use. On the more enterprise-ready side there is SOPS by the heroes over at Mozilla.
Note that if you’re using git-crypt and you’re using the symmetric key (which you’re taking and storing offline/in a password manager/somewhere nice and safe, of course!), GPG users are a fantastic way to mediate who has access. git-crypt add-gpg-user makes things really easy.
This was a pretty quick guide to my laid back deployment process, which I set up after writing a blog post in a cafe but the network I was on not allowing me to easily deploy. Rather than doing the reasonable thing and setting up my blog to run off of some shared hosting or picking something like neocities, I figured the answer to this was to set up CI on the repository. Another day, another yak shaved.
I’m still planning on going through and taking a thorough look at Flux and ArgoCD but until I do, this is the easy way I do my deployments, taking advantage of the sunk cost ease Kubernetes provides.